

Strong and capable. The Allevi 3 delivers autocalibration, 4-160°C temperature control, and visible/UV photocuring in three independent printheads. Find your bioink of choice and start building. This quickstart guide of manuals and videos will help you get started with your new Allevi 3 bioprinter.
Specifications
View Allevi 3 specifications.
Setting up your bioprinter
- Carefully remove your printer from the packaging by grasping the printer frame firmly with both hands.
- CAUTION: The Allevi 3 weighs ~48lbs (22kg). Two people may be required to safely lift it.
- Once the printer is securely placed on a flat surface, connect the CORE extruders to the gantry. Each CORE extruder is magnetized so each will snap into place.
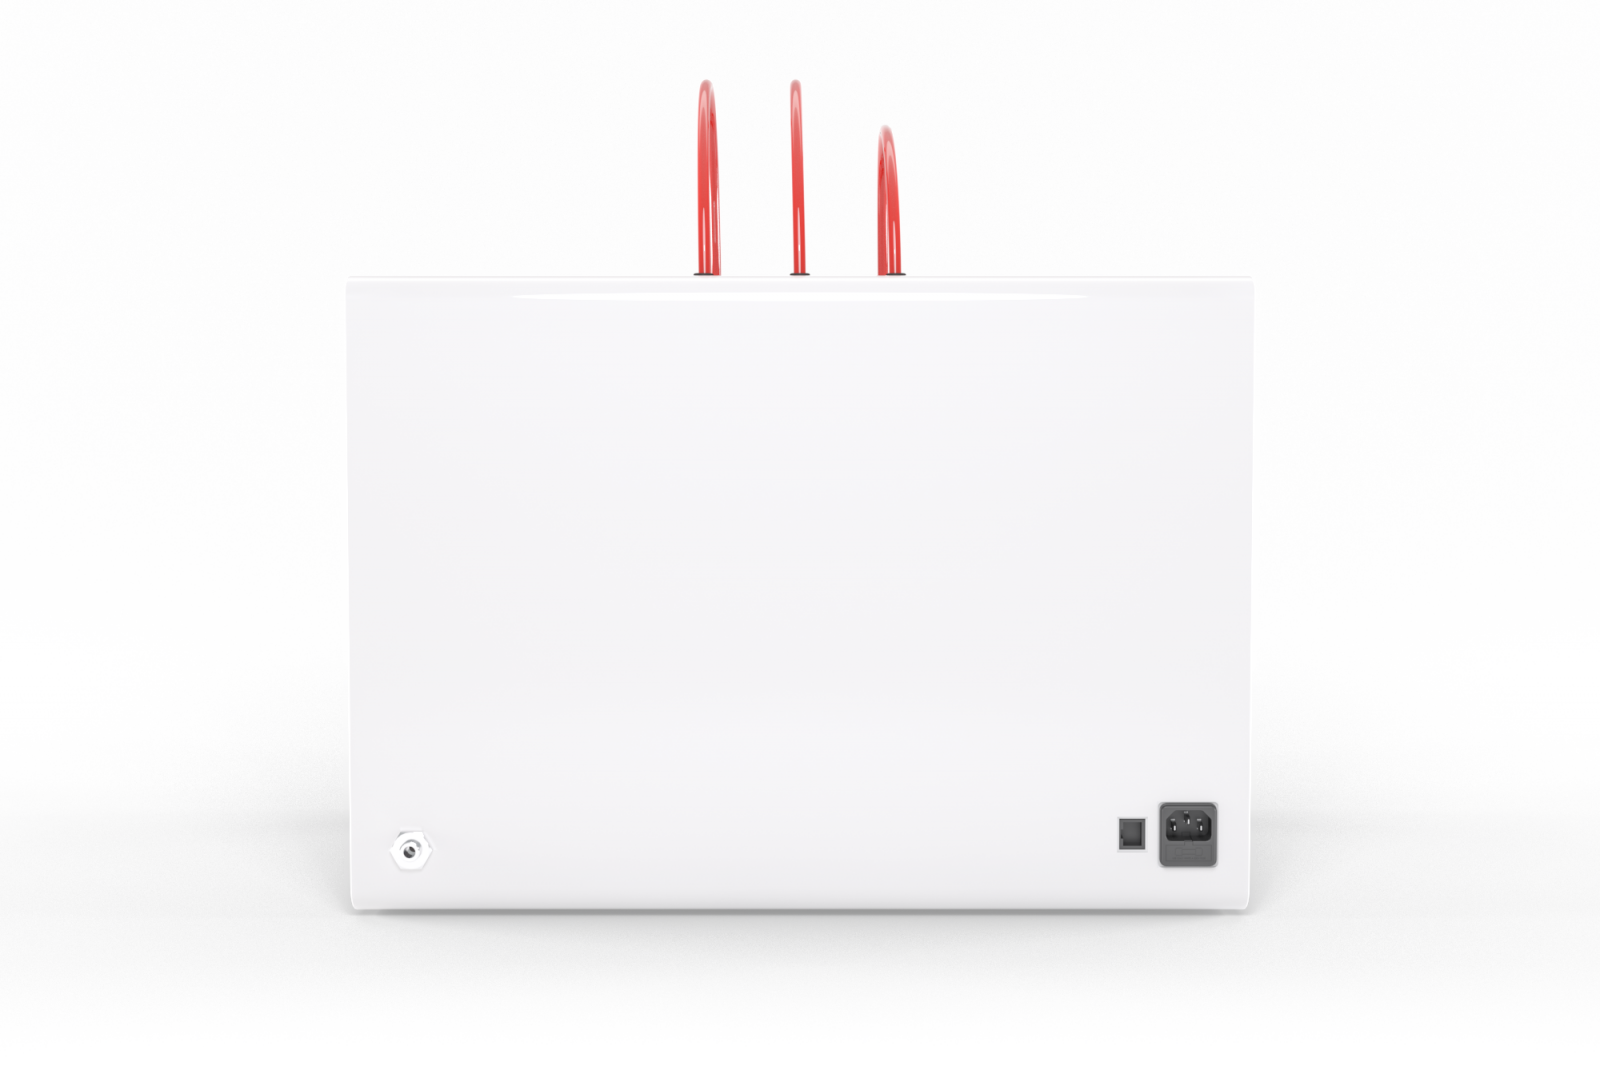
- Connect the red plastic air hoses to the top of the frame, and the air input junction to the port on the back of the frame.
- Plug the power cable into the power port located on the right side of the back of the bioprinter. Then plug the other side into a wall outlet.
- Power on the bioprinter by pressing the power button located on front of the bioprinter. It will turn red.
- Connect the air compressor to the black air hose, and the air hose to the air input junction on the printer.
- The connection between the hose and the junction can be tricky. Follow this diagram:

A. Gather both the air input junction (left) and the air hose (right).
B. Pull back the collar of the air hose.
C. Insert the air input junction in the air hose.
D. Slide the collar of the air hose back into place.
E. The connection should be formed!
F. Give the connection a light tug to ensure it is secure.
The air compressor must remain turned on for the entirety of the print. We recommend keeping the air compressor set to a pressure significantly higher than your print pressure. This is so that as the air compressor loses some pressure and refills, your print is not affected. The air compressor’s pressure can be adjusted by turning the black knob. It has a max pressure of 120PSI.
Setting up your software
- Go to bioprint.allevi3d.com. Our software runs out of a browser and requires no downloads! We recommend Google Chrome or Firefox, but Safari and Edge are also acceptable.
- Login to the software. To set up an account, click ‘Create an account’ and fill out the form.

- Creating an account is great, but let’s get you set you up to add some teammates! Follow our Allevi Teams Guide to create a Team. We recommend doing this first so that your printers and files are easily shared with others.
- As you follow the rest of these instructions, make sure your Team account is active, rather than your Personal account.
- To register your printer, scroll down in your printer list and click ‘Add printer.’

- Type in your device serial number and click ‘Add printer.’ Your serial number can be found on the back of your printer or in your onboarding email from the Allevi Support Team. If someone on your Team has already registered your printer, contact Allevi Support to gain access.

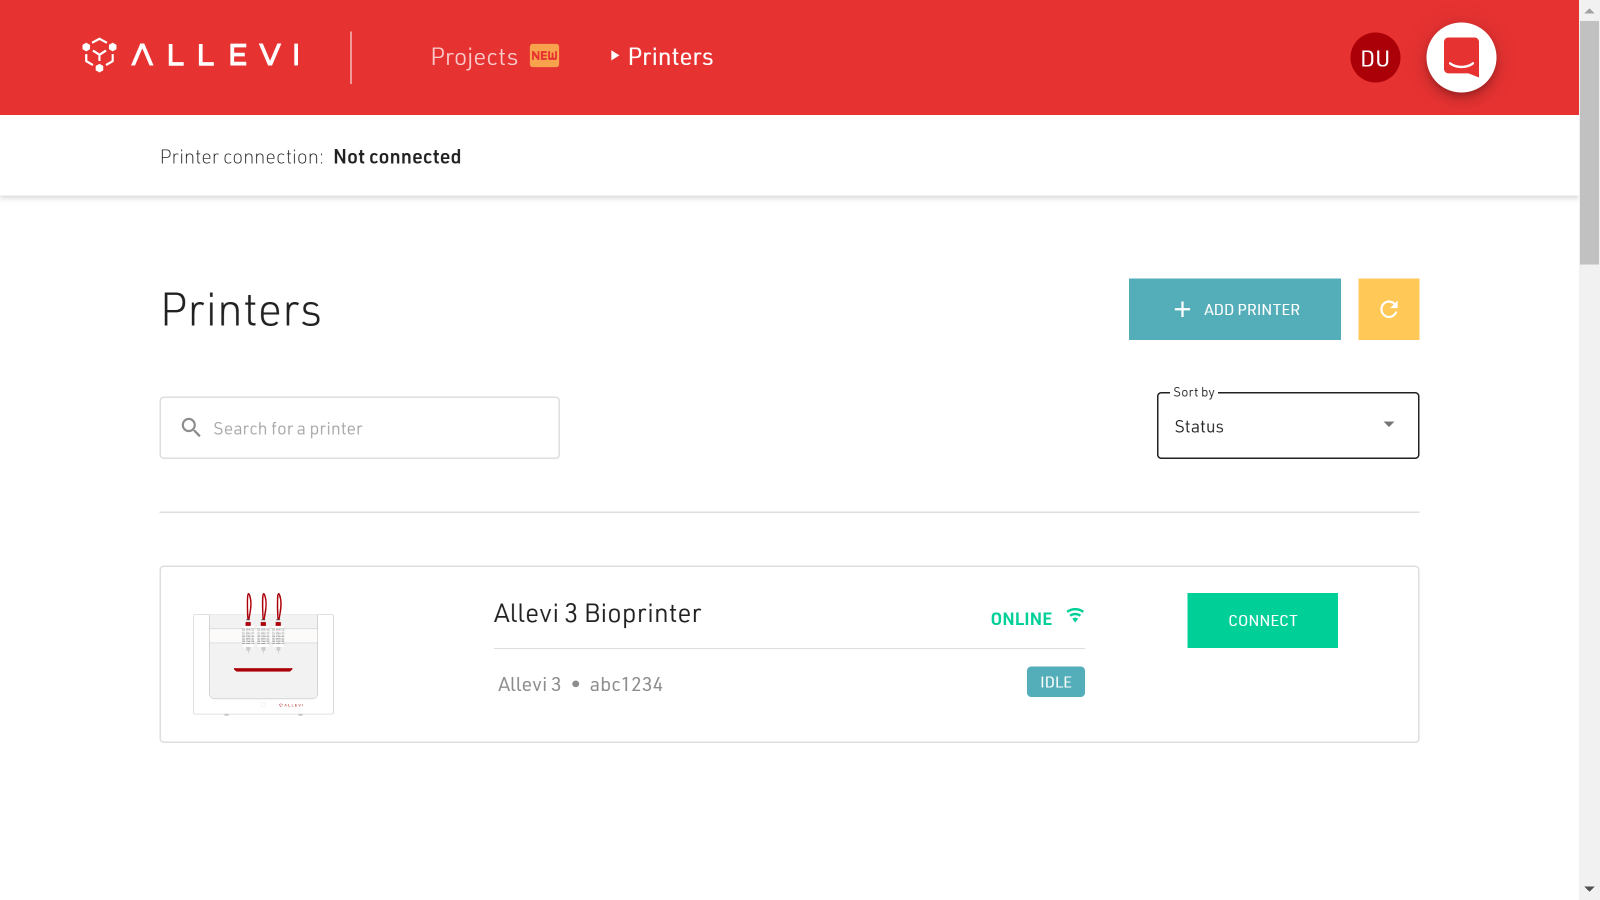
- Once your printer is registered, it will appear as an available printer in your printer list. You can also see its Internet connection status.

Getting Connected
Networking Requirements
A downloadable PDF containing our updated networking requirements for both our Bioprint Software and for the Bioprinter can be found in our Allevi Connection Troubleshooting Guide at the below link:
https://devu11b.onlinetestingserver.com/allevi3d/allevi-wifi-connect-troubleshooting/
Cloud Mode
To use cloud mode connect your Allevi bioprinter to the internet using either an ethernet (wired) or Wi-Fi (wireless) connection. Please note that you will need to be in cloud mode for any future firmware updates.
Ethernet Connection
To connect your Allevi bioprinter via ethernet, plug an ethernet cord to the port on the back of the bioprinter and to an ethernet port in your lab. Your Allevi bioprinter will be in cloud mode now and ready to connect to in your bioprinter dashboard.
Wi-Fi Connection
With a Wi-Fi connection, your Allevi bioprinter will be online in cloud mode.
- Open your the WiFi settings on your computer and look for a network called “Allevi Printer #######”. Connect to this network.
- The password for the Allevi Printer ####### network will be allevi_####### where the last seven digits will match the printer serial number.
- To type in a password, you may need to click “connect using security key instead”
- By connecting to the Allevi hotspot, your computer will briefly lose access to the Internet.
- Open a browser tab and go to http://10.42.0.1/ . This will open the Printer Configuration screen.
- Click the ‘Configure’ beneath the WiFi Settings header.

- Once in the WiFi settings, select an appropriate WiFi Network from the drop down menu.
- The chosen Wi-Fi network should be a private network without a ‘Click to accept’ intermediate page.
- A green message will pop up at the bottom of the page. You can now close this window.
- After a successful Wi-Fi connection is added, your printer should attempt to join your selected network using the login credentials you just entered and should stop producing the “Allevi Printer #######” network.
- Reconnect your laptop to your institution’s wireless internet and navigate back to Allevi Bioprint Online. Your bioprinter will be in cloud mode and ready to connect.
Adapter Mode
The Allevi Wireless Adapter gives you access to the Adapter Mode of connection. With this connection method, your Allevi bioprinter will not be connected to the internet itself, but it will communicate directly with your computer via local Wifi.
- Download the official driver here. Extract the downloaded .zip file and run the installer. This allows your computer to connect to two Wi-Fi networks at the same time.
- Download the Allevi Client app here. Extract the downloaded .zip and run the application. You’ll need to keep this open whenever you are using your Allevi bioprinter.
- Plug your Allevi Wireless Adapter into your computer’s USB port.
- Turn your Allevi bioprinter on.
- In your Wi-Fi list, you should see a dropdown to select different Wi-Fi networks. The dropdown allows you to switch between “Wi-Fi 1” and “Wi-Fi 2”; however, on some computers this may be called “Wi-Fi 2” and “Wi-Fi 3”. See the screenshot below for an example with “Wi-Fi 2” and “Wi-Fi 3”. It does not matter what your networks are called, as long as they are connected as follows:
- Lower Numbered Wi-Fi: Connect this to your home or work Wi-Fi network
- Higher Numbered Wi-Fi: Connect this to the Allevi Bioprinter Wi-Fi Access Point, called “Allevi Printer <serial number>”
- The password for the Allevi Printer ####### network will be allevi_####### where the last seven digits will match the printer serial number.
- To type in a password, you may need to click “connect using security key instead”

- Open a browser tab and go to http://10.42.0.1/ . This will open the Printer Configuration screen.
- Click the ‘Configure’ beneath the Adapter Settings header.
- Use the switch to turn adapter mode on.
- Switching over may take a few minutes.

- Navigate to Allevi Bioprint Online and log in as normal using your Bioprint Online credentials.
- If the connection is successful, you will see the following state on the Allevi Client Application and a green connect button in the bioprinter dashboard.


Switching From Cloud Mode to Adapter Mode After Connecting Via Cloud
If your printer is already online and you are just switching over to adapter mode, use the cloud icon in the printer list and follow the on-screen prompts.

Then see steps 1-5 above in the Adapter section. Finally, skip to step 10.
This is a fairly rare case and would likely only come up during troubleshooting or a change of lab environment.
Running a print
The Allevi Bioprint Online software is the most comprehensive and versatile bioprinting software. We recommend watching this introduction video.
- With your Allevi 3 turned on and connected to the Internet, you can get started by clicking connect!
- NOTE: Upon turning on your Allevi 3, all extruder will retract.
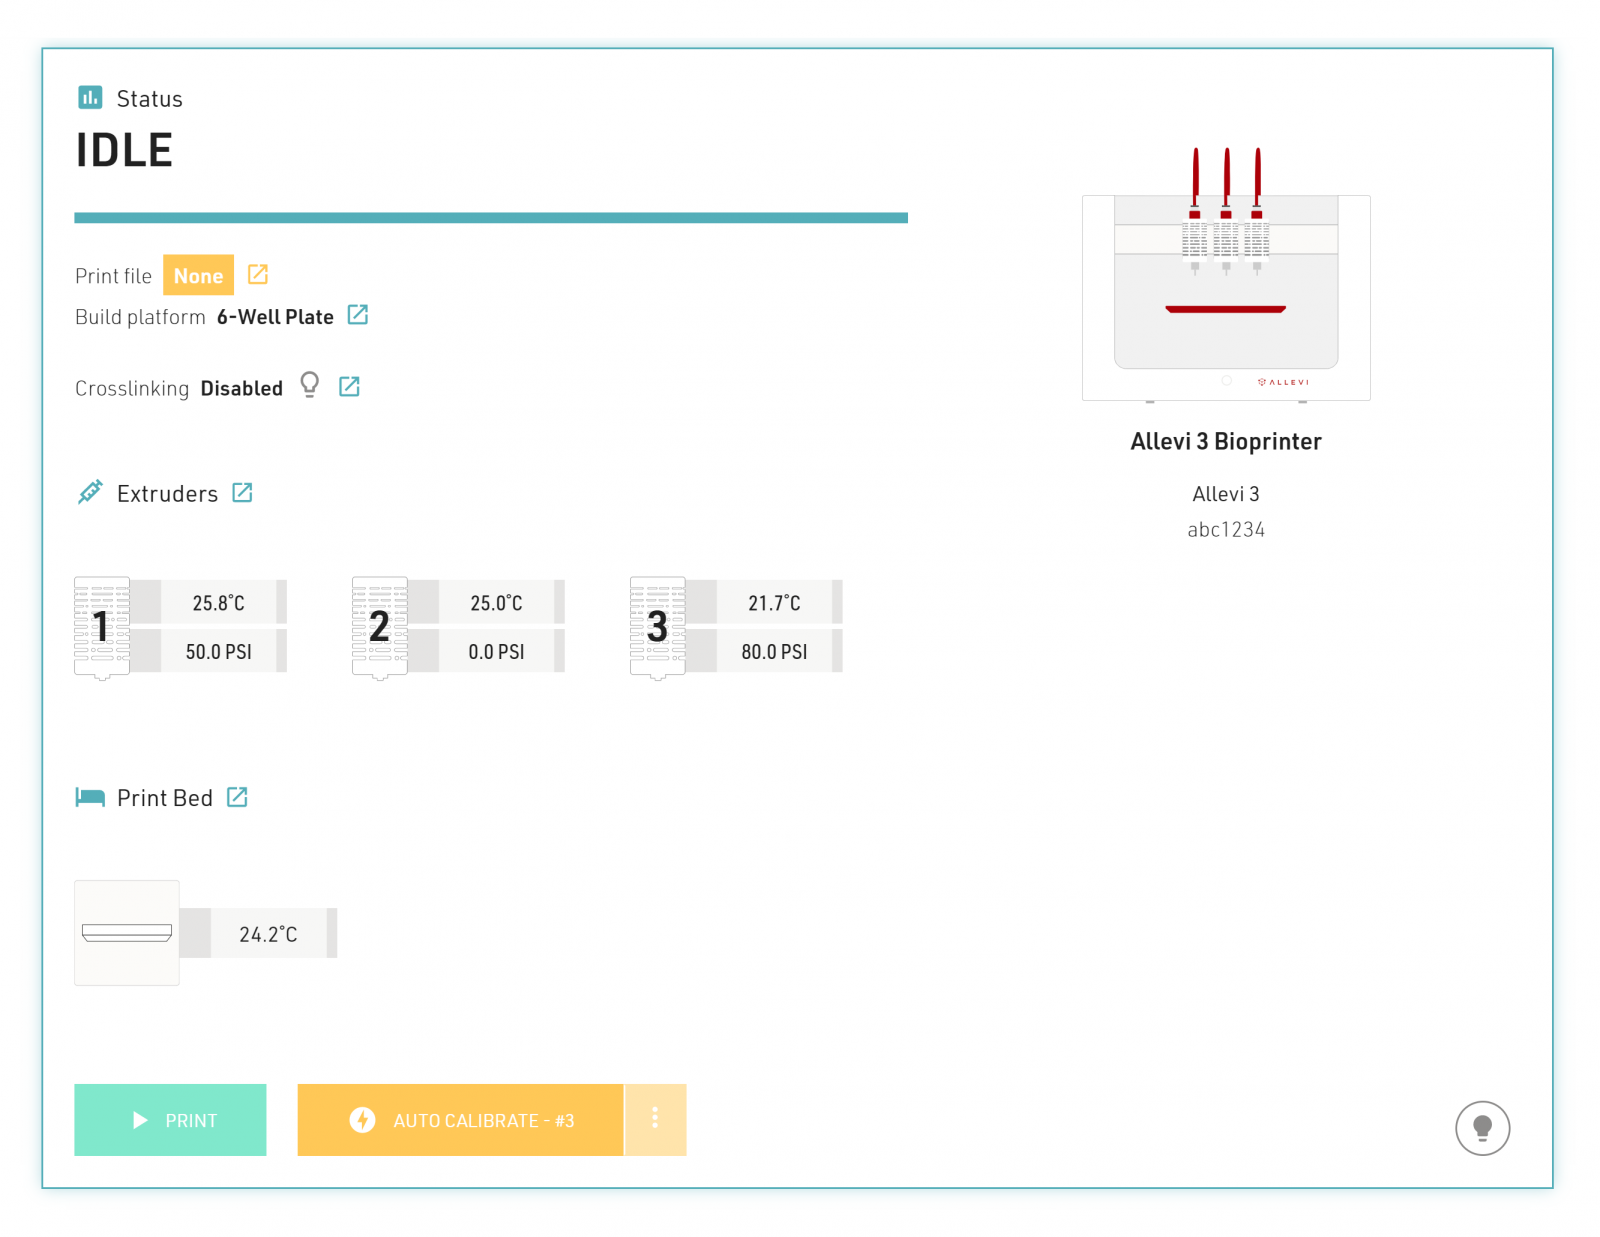
- This will bring you to your printer Status section. Here you can get an overview of your print settings.
- The next section is your Current Print section. You can either upload STL or gcode files. If you upload an STL, you can modify the Allevi Online Slicer settings. For STL files, you can changes settings such as Print Settings, Infill, and Offsets. You can also download a sliced STL as a gcode file.

- Next, choose your dish in the Build Plate section. For wellplates, print files will automatically be replicated in all wells.

- The Extruders section allows you to move and calibrate your extruders. You can also set extruder temperature, pressure, and test extrude by holding the button. With a syringe and needle loaded, click ‘Autocalibrate’ to get started. All attached extruders must be calibrated in order to print.
- For more tips on loading materials into your syringe, you can follow our guide Loading Viscous Materials for Bioprinting.
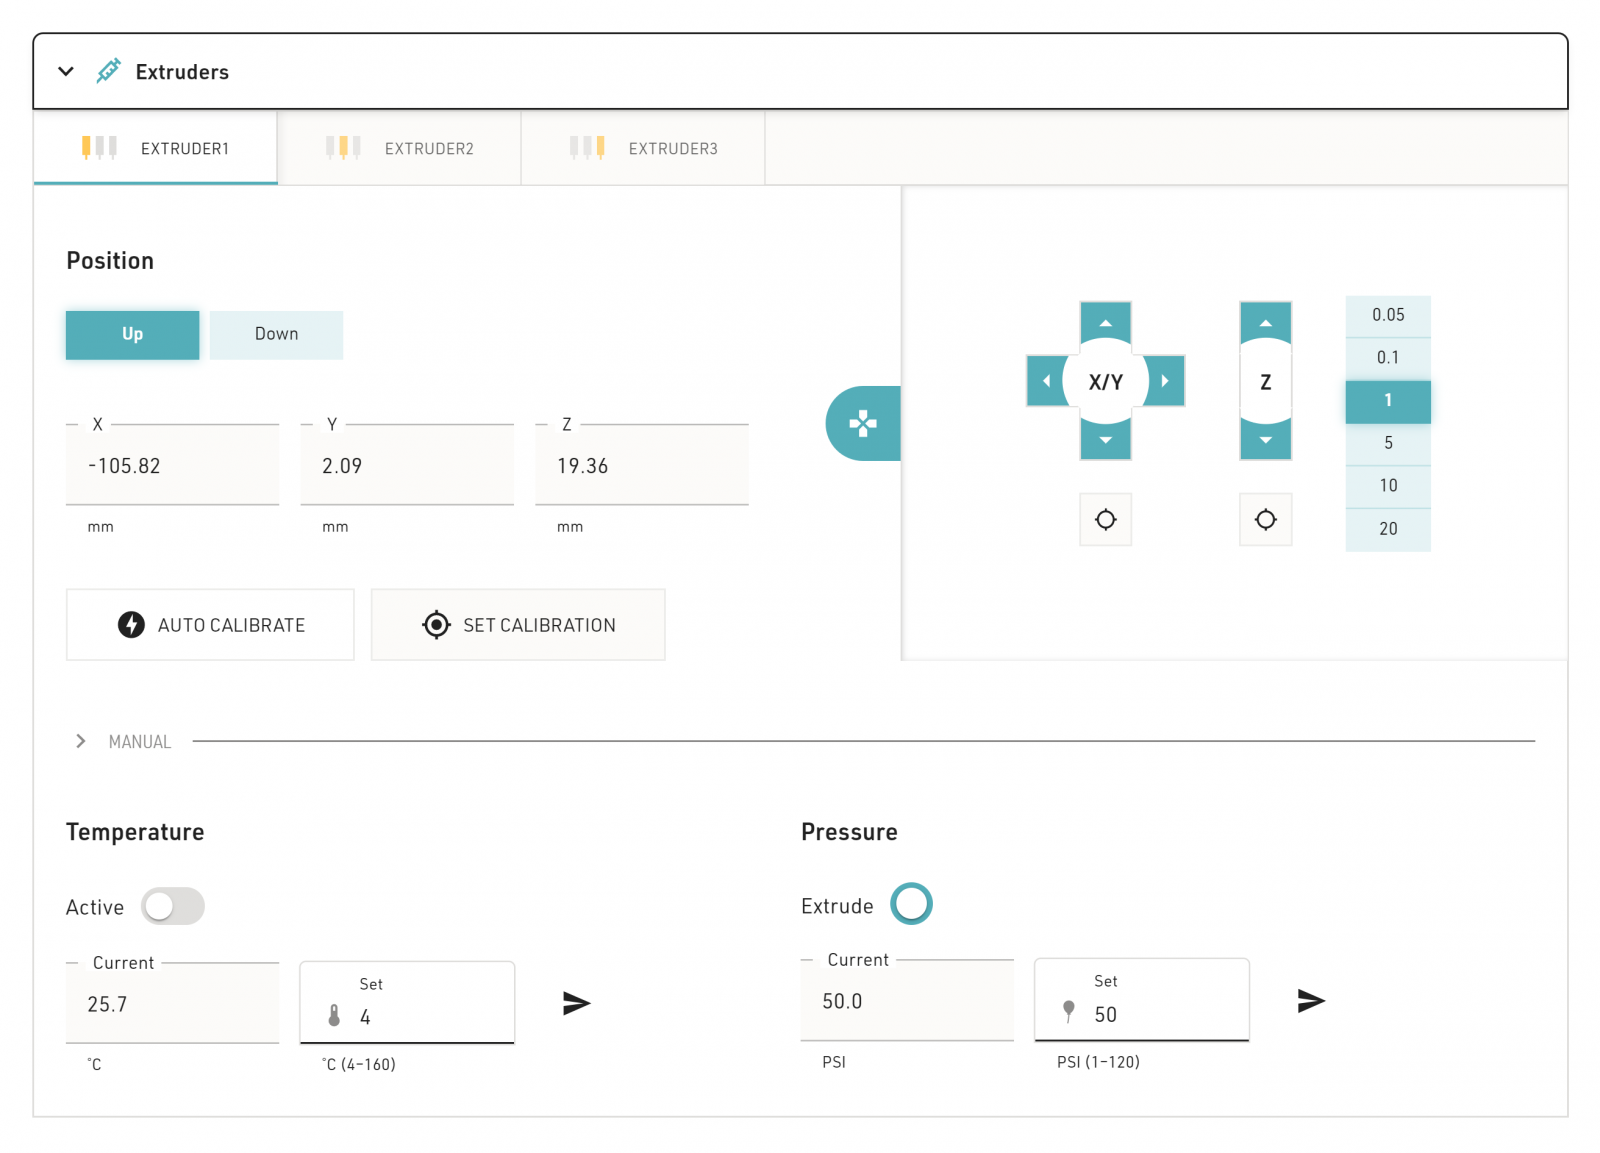
- To manually calibrate the printer, open the jog panel:
- Click the origin button under the X/Y controls. This will center your extruder over your chosen build plate.
- Using the Z controls, move the bedplate closer to the loaded extruder to the point where the dish is almost touching the needle.
- NOTE: Use the test extrude button to see if the needle is properly positioned. If the needle is too low, no material will come out. If it is too high, then a dangling line will be extruded.
- Under extrusion, the needle should just touch the dish. Do not leave a gap between the needle and dish as the gcode automatically adds the appropriate layer height. Finer 0.1mm and 0.05mm movement can be used when approaching the dish.
- Click ‘Set Calibration’ to save your position as the calibration.
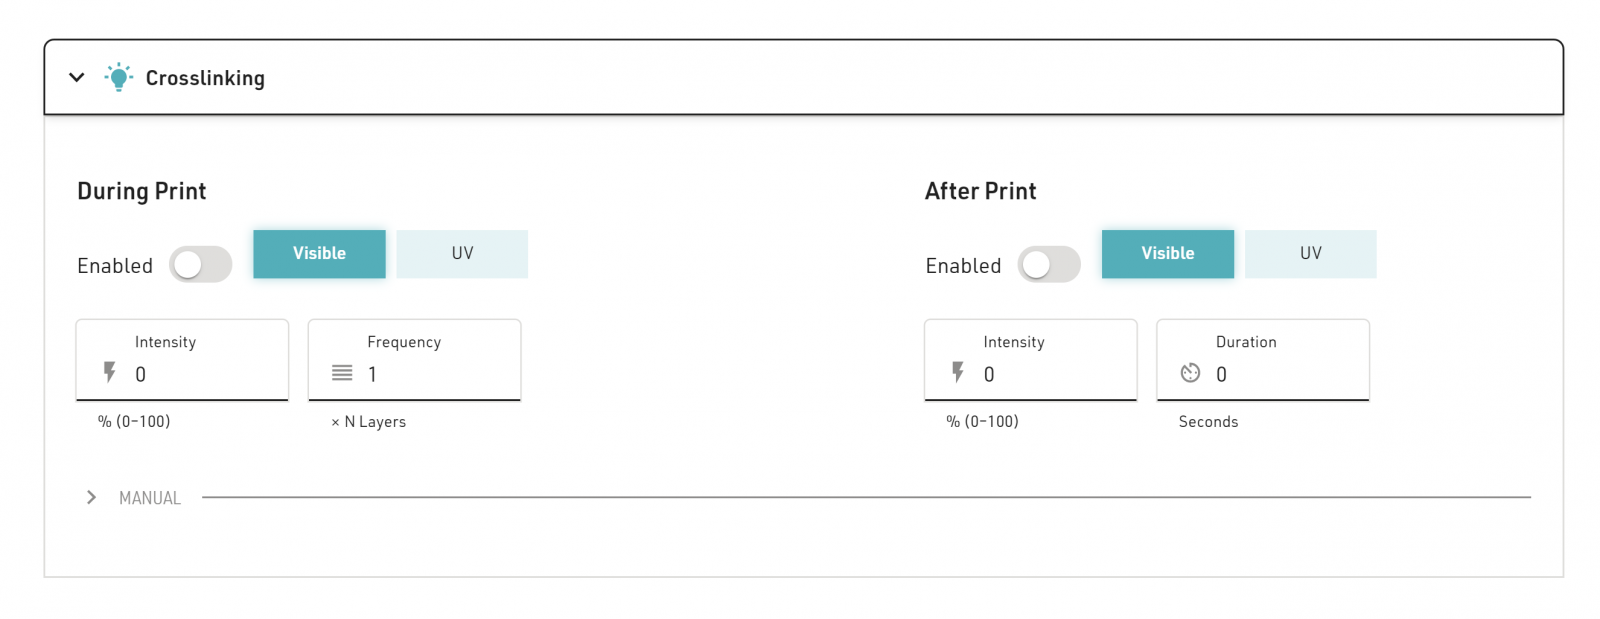
- In the Crosslinking section, there are three main settings: Always On, During Print, and Post Print. They use variables such as light intensity, layer frequency, and duration. For photocurable bioinks, the Allevi 3 offers both UV (365nm) and Visible (405nm) light crosslinking. To control a certain extruder’s crosslinking settings, make sure you select that extruder in the Extruders tab first.
- The Print Bed section is where you control the print bed temperature, which ranges from room temperature to 60°C. For more even heating, use the metal inserts that came with your printer.

- Once you’ve loaded a print file and calibrated your extruders, you can click ‘Print’ to start building with life!


