

Bioprint Pro allows you to design and bioprint easily repeatable experiments. With it, you get access to an experiment-based workflow, our Integrated Shape Editor for easy CAD modeling, and optimized biomaterial presets. The Bioprint Pro software makes bioprinting easy.
Table of Contents
Hide
The following steps occur in Allevi Bioprint Online, available at bioprint.allevi3d.com.
Creating a Bioprint Experiment
- Go to the Experiments tab of your software. Here you can view previous experiments, as well as edit and print them. To create a new one, click ‘New Experiment’.

- Select the printer you’ll use for this print. You can add an Experiment name and description as well.
- Note: While experiments can be edited later, you cannot change your printer model after this step.

- Select the build plate you want to print on. We also have options for dish manufacturer and model for autocalibration purposes

- Experiment Layout allows you to print well-specific constructs with well-specific parameters. If you want the same construct across all wells, then leave the toggle off.
- Note: Experiment Layout is not available for petri dishes or glass slides.

- To create different groups, click ‘Add Group’. To assign wells to a group, click the paintbrush icon and select the wells. You can also click and drag to select multiple wells at a time. Once done, click away to update the ‘Well selection’ field.
- Note: You can create as many groups as there are wells.

- In the Structures section, you can upload STL files or create structures using the Integrated Structure Editor, and see a preview in your well plate. To rotate your view, you can click and drag. You can also scroll to zoom in and out.

- If you’re using a customized layout, you can assign different structures and slicer settings to different groups. You must assign a structure to each group to continue.

- Click ‘Add File’ to upload STL or gcode files. You can also add 3D models by clicking ‘Add Structure’ to use the Integrated Shape Editor. This creates an ‘STL’ which you can then slice using the settings beneath it. You can make cubes, cylinders, or dots.
- Note: Adjusting slicer settings does not change the preview.

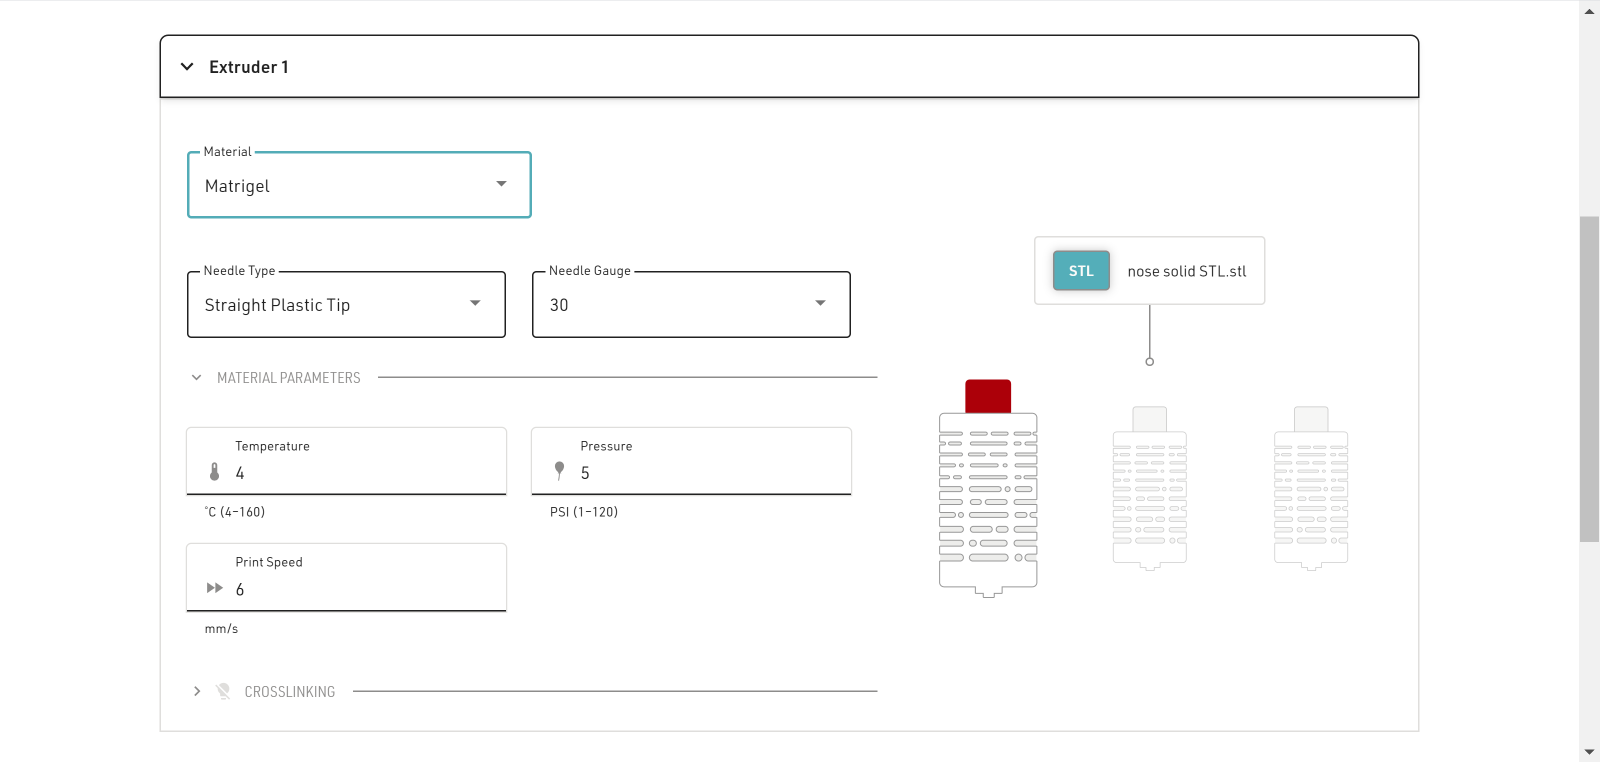
- The Materials page allows you to set different materials settings across extruders and groups.
- Note: Print Bed heating is universal across an Experiment. You cannot turn it on or off for specific groups.

- Selecting your materials is easy with Bioprint Pro! Click the drop-down material menu and select a preset. This will automatically populate all the printer parameter fields with our recommended values. You can edit these as desired.Once you’re done, save your Experiment.
Printing an Experiment
- Experiments make it easy to repeat the same prints, quickly and reproducibly. With all your previous settings already saved, all you need to do is click ‘Print’ to get started!

- Select the printer you want to print on. You can select any printer as long as it matches the model specified in the Experiment.

- The software will now walk you through setting up the print. Insert your chosen build plate.

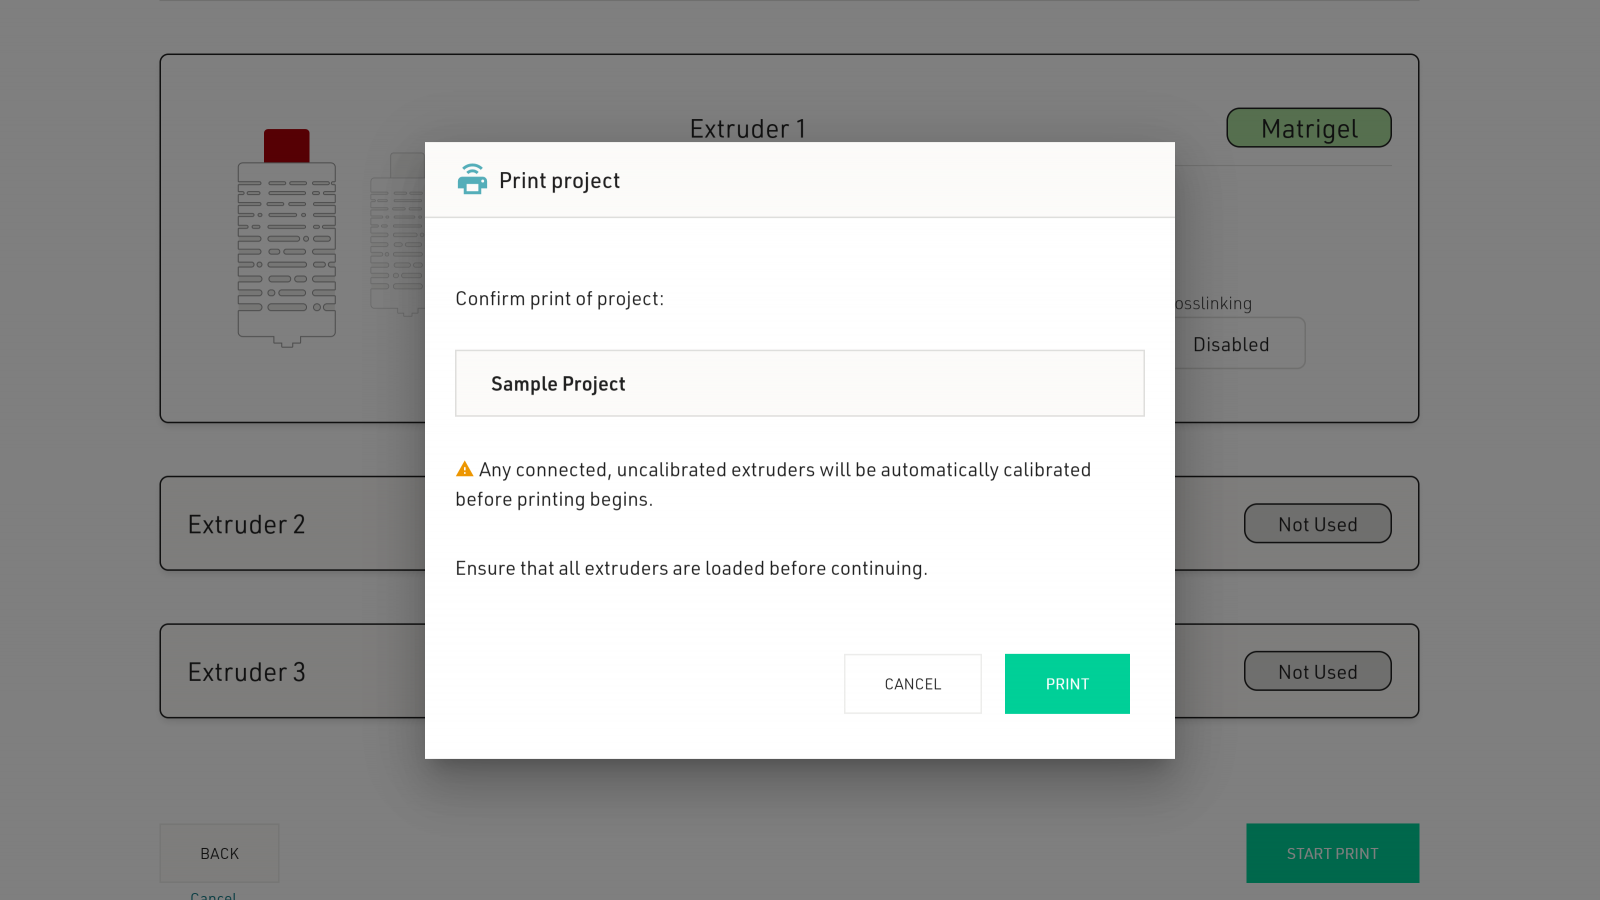
- Load your materials in the extruders. Confirm the settings and make sure that your air compressor is on. If you are not using the other print heads, you can remove them.

- When ready, click ‘Start Print’ to print your project! The software will ask you to confirm and will automatically autocalibrate any connected print heads.
Have any questions about your projects? Contact the Customer Success team at support.allevi3d@3dsystems.com
Interested in upgrading to Bioprint Pro? Contact the Sales Team at sales.allevi3d@3dsystems.com to get more information or a quotation.


